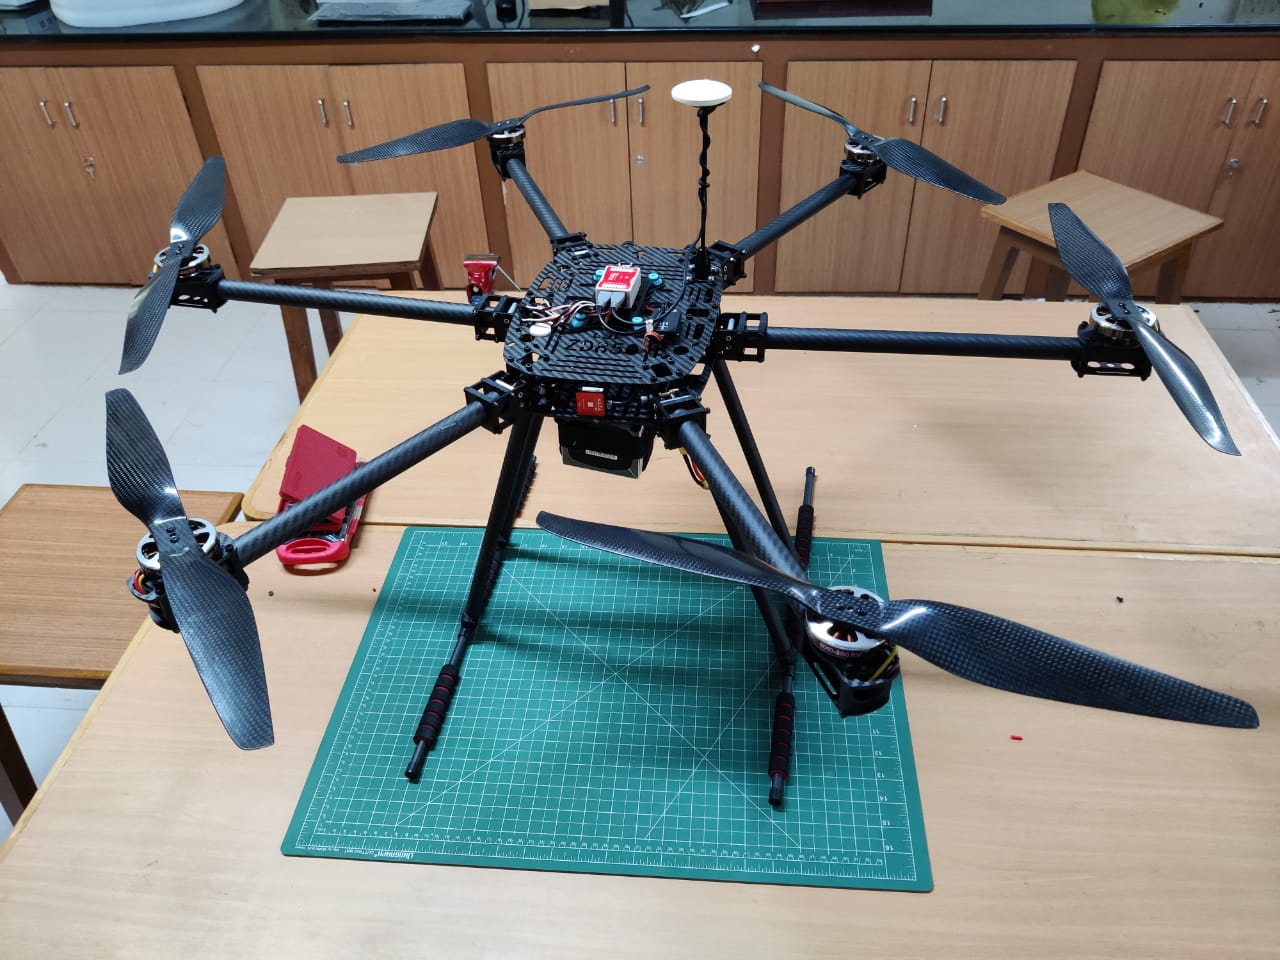
Parts of the Hexacopter
- Frame: Lji ZD850 Z6 Plus
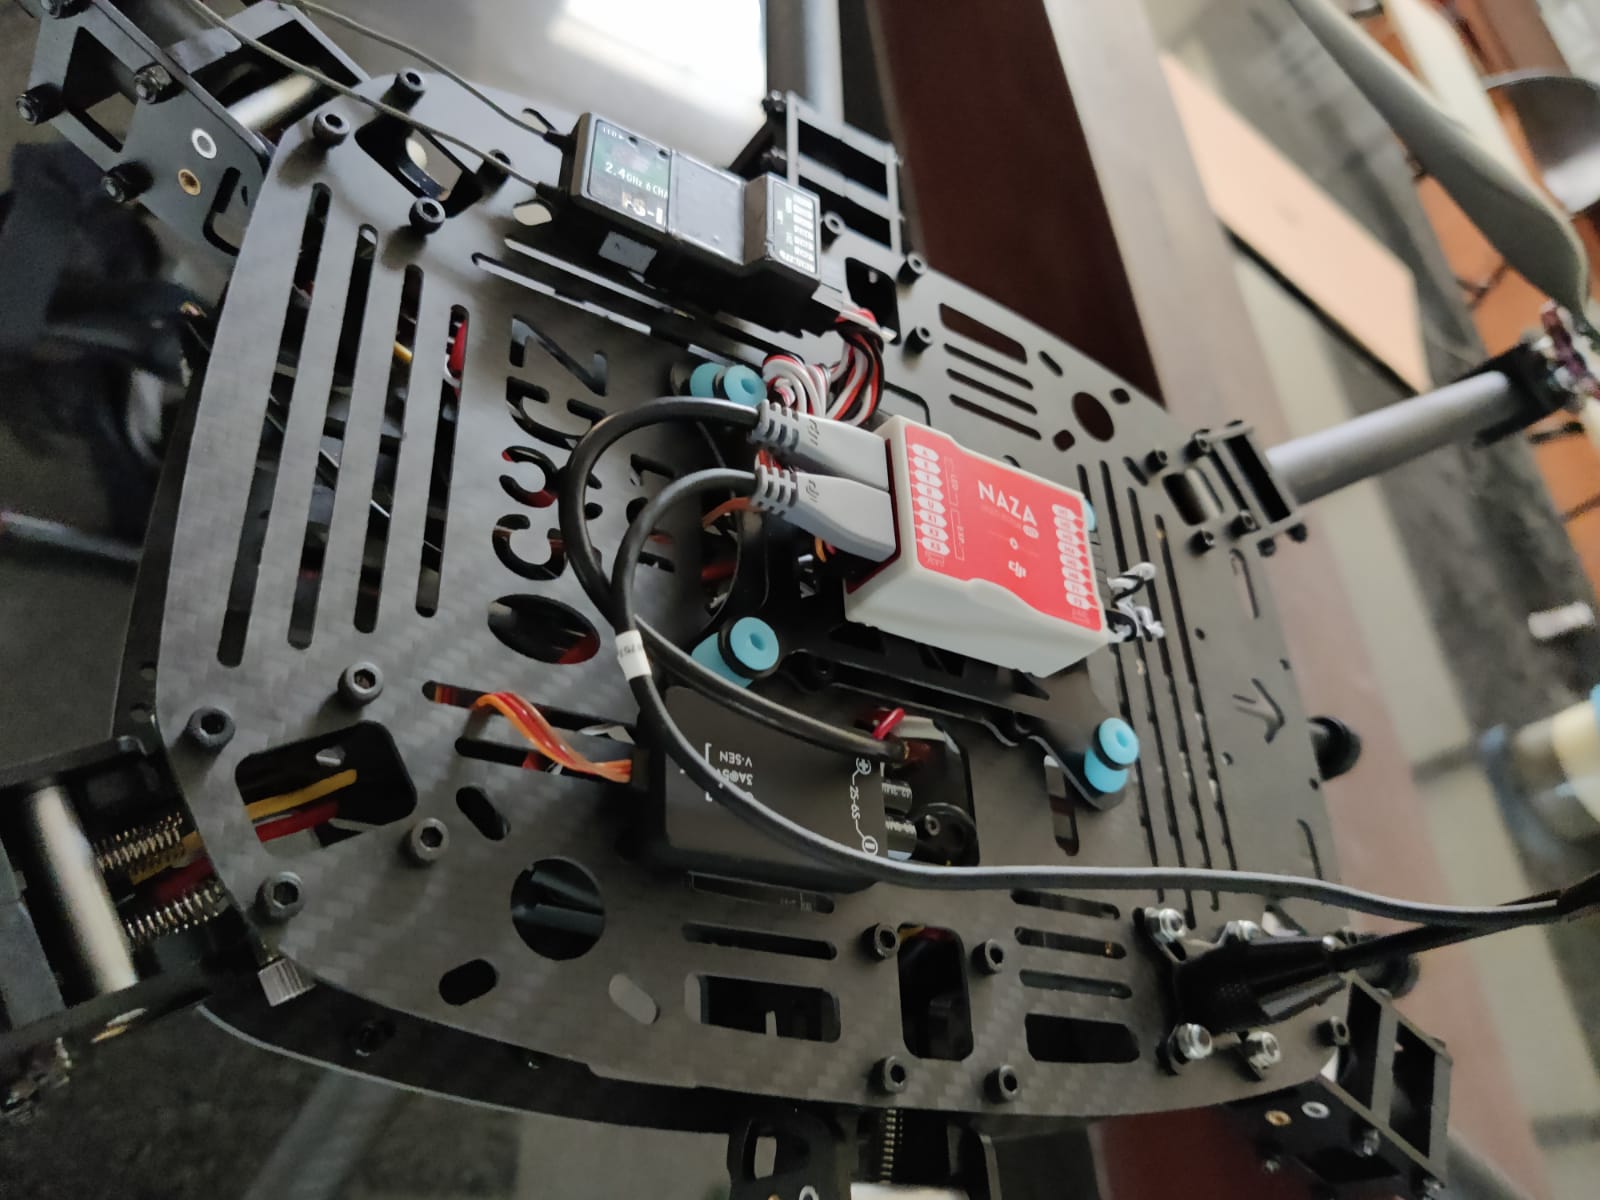
- Flight Controller: DJI Naza-M Lite
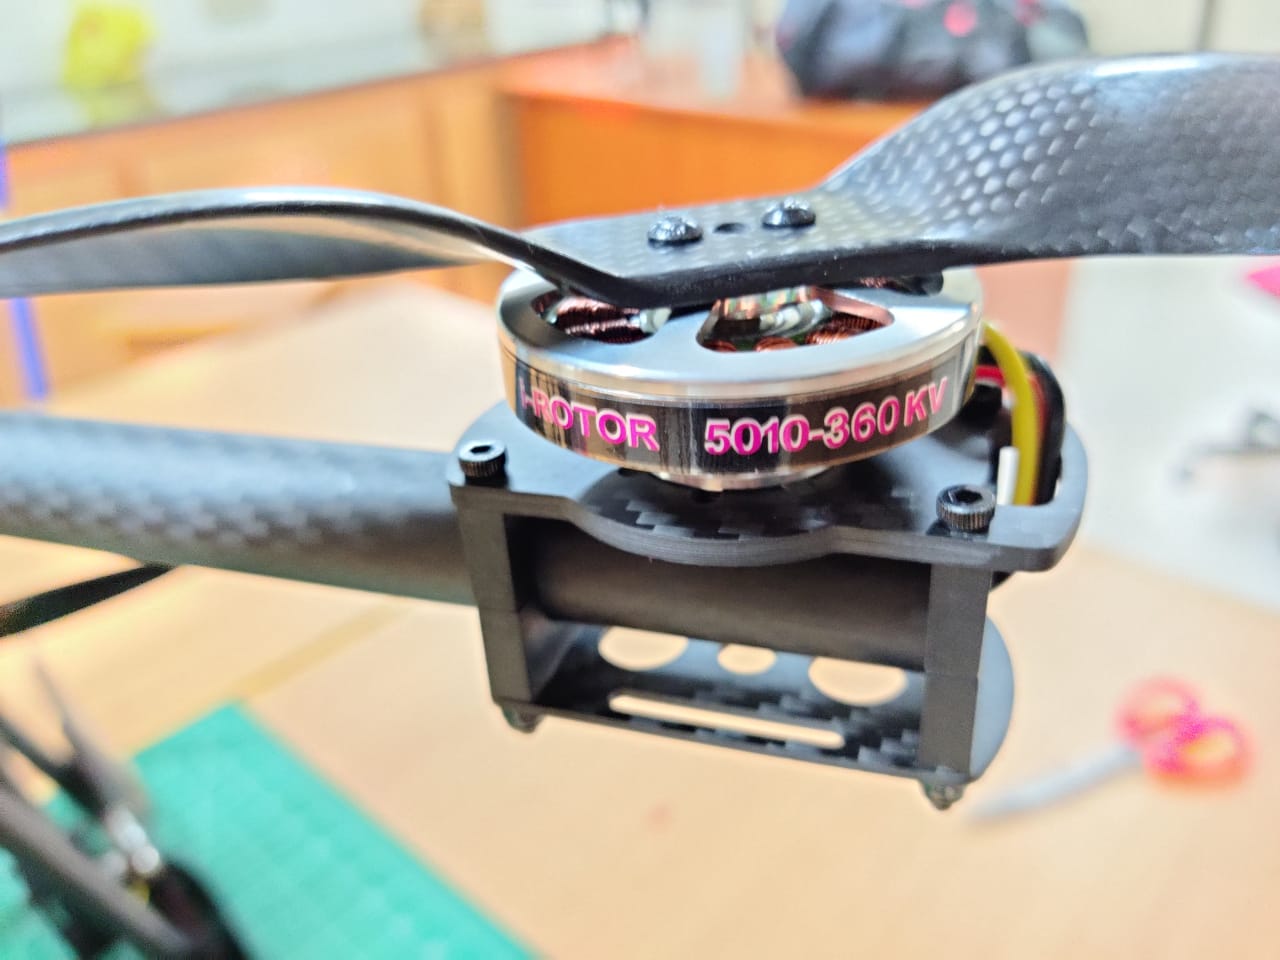
- Motors: 5010 360KV High Torque Brushless Motor
- Receiver: FrSky X8R
- Props: 1655 3K Carbon Fiber Propellers
- Battery: TATTU 16000mAh 15C 6S LiPO Battery
- Assemble Frame
- Add the Motors
- Mount Electronic Speed Controllers and Power Distribution Board
- Mount Flight Controller and Transmitter
- Mount Additional Modules
- Link Reciever to the FC
- Assemble Propellers
- Software Calibration
- Conclusion and Flight
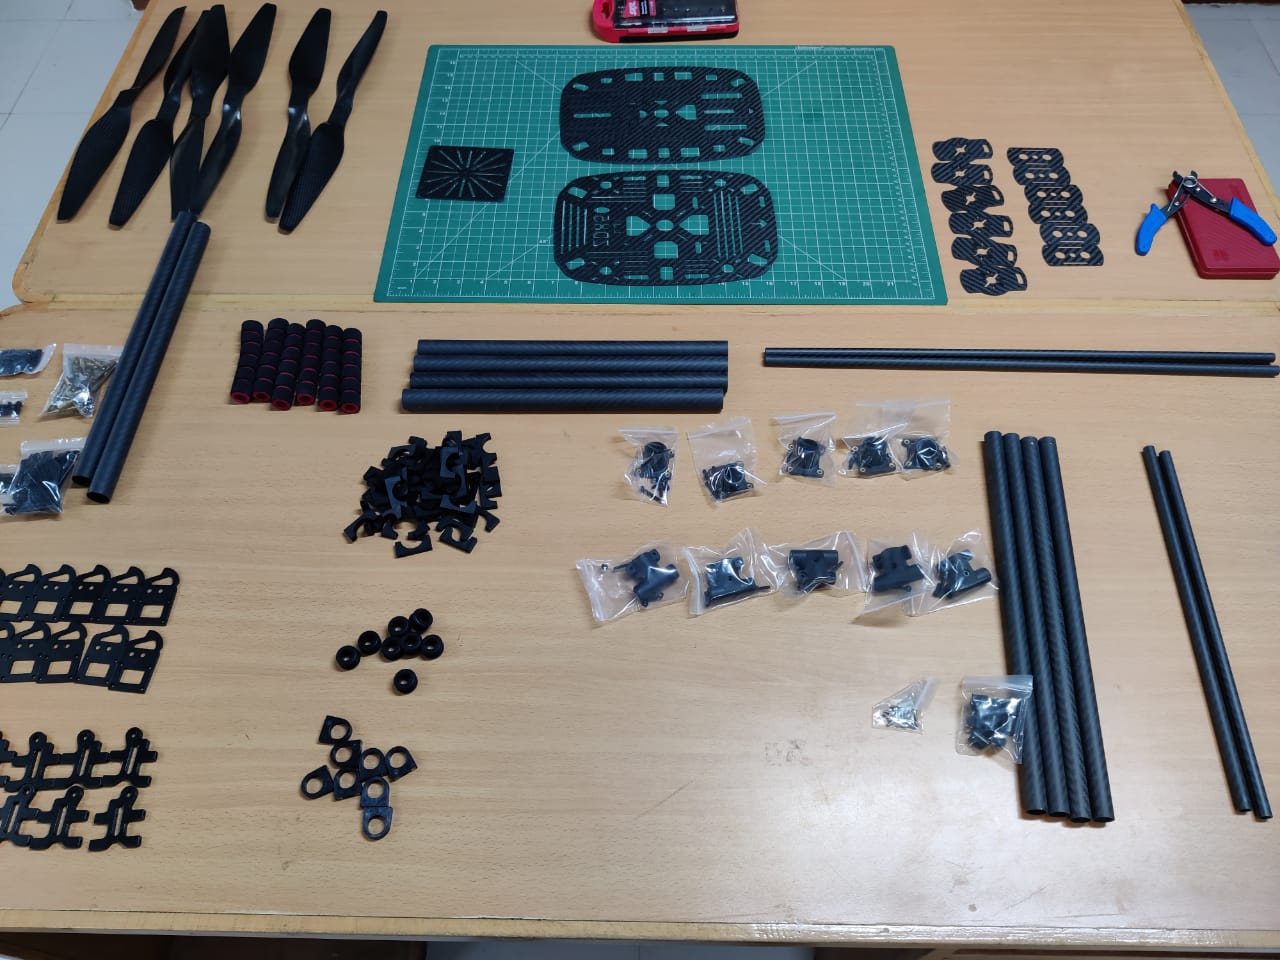
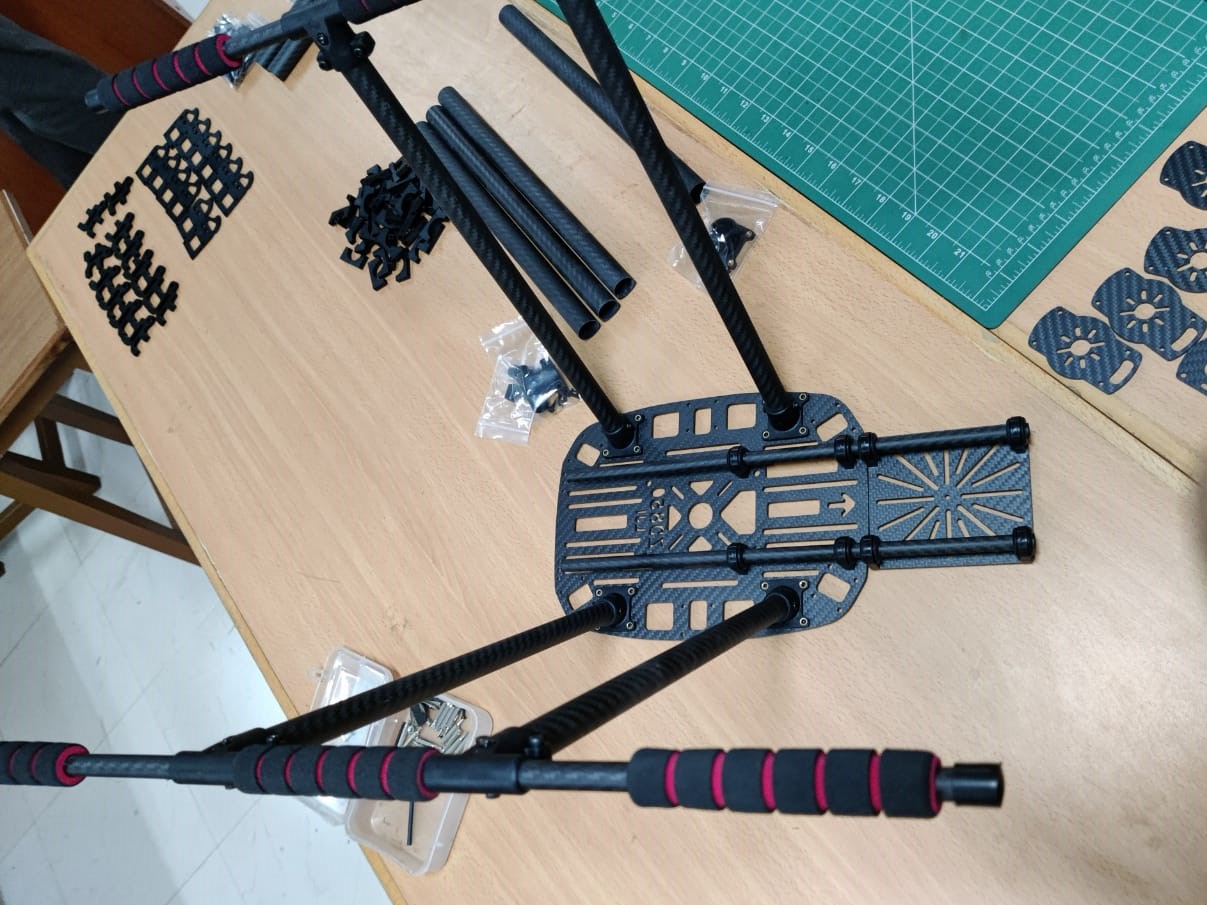
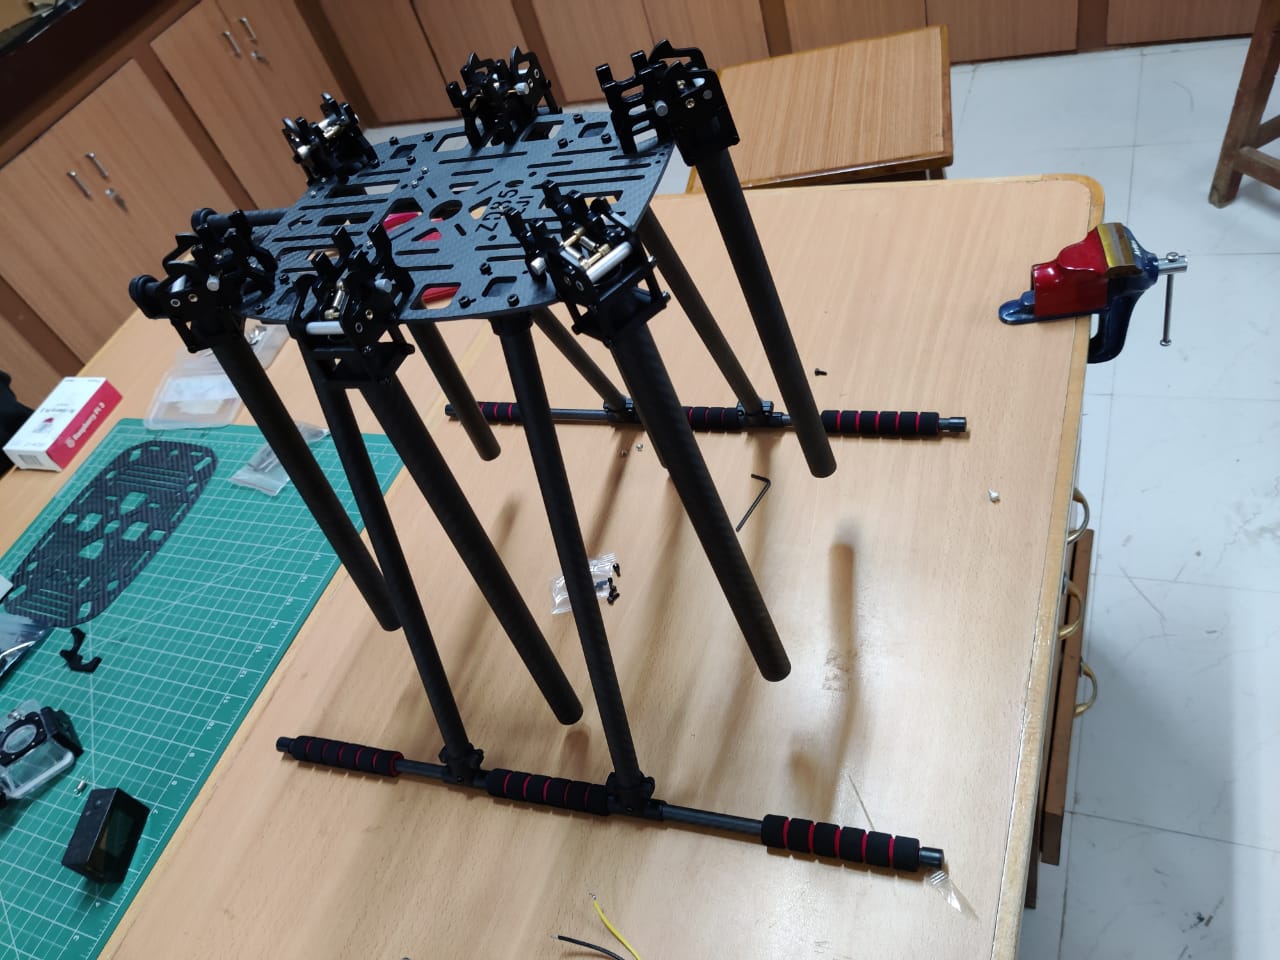
The Lji ZD850 does not come with assembly instructions, Hence the above images should guide you to assemble this frame. The build consisted of assembling the main frame, then pushing the arms into the main frame and sandwiching them together after inserting the threadlocker. After tightening, make sure that the arms can still be opened or closed into the locking position.
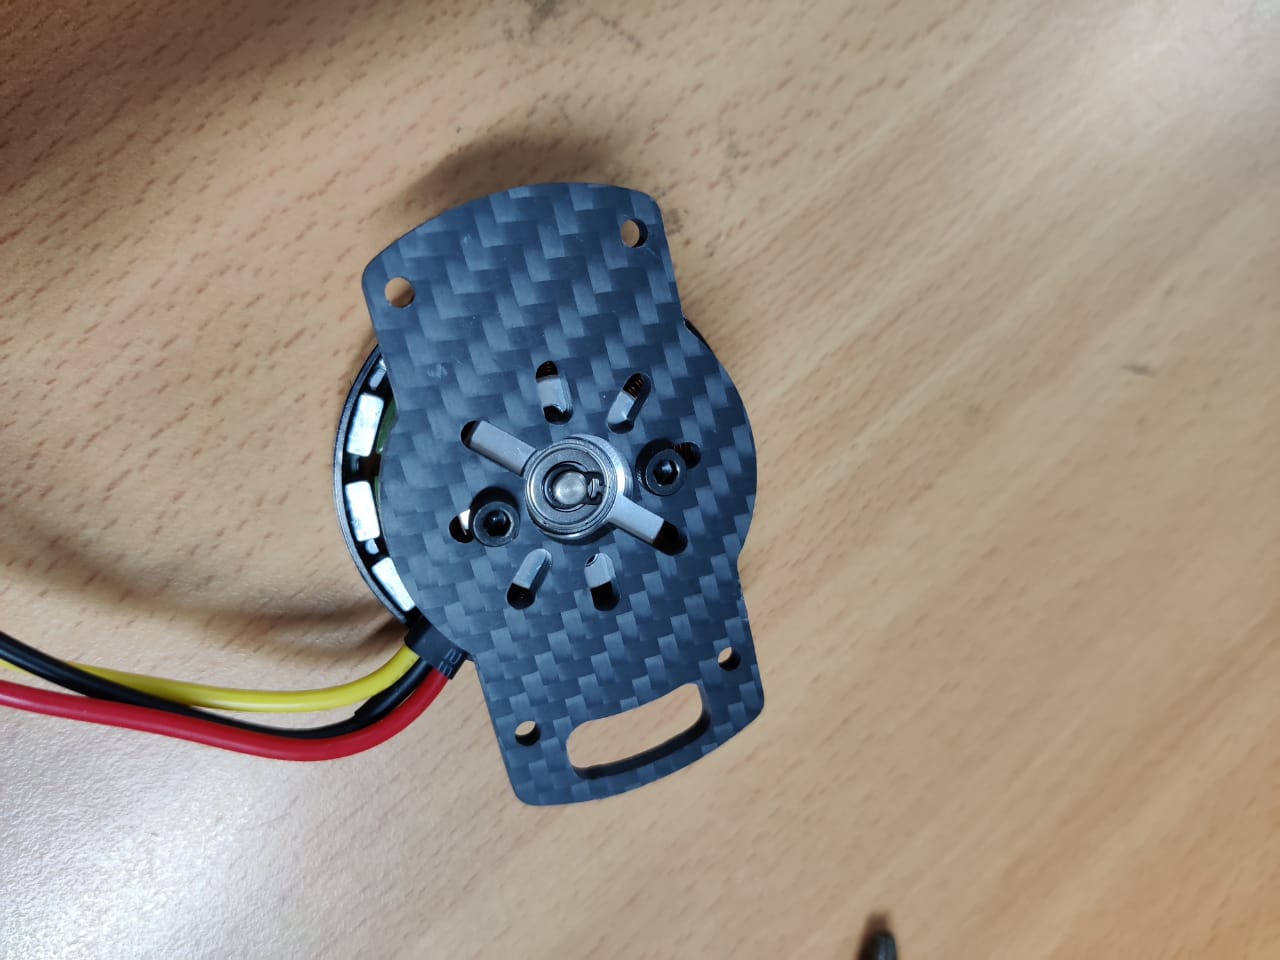
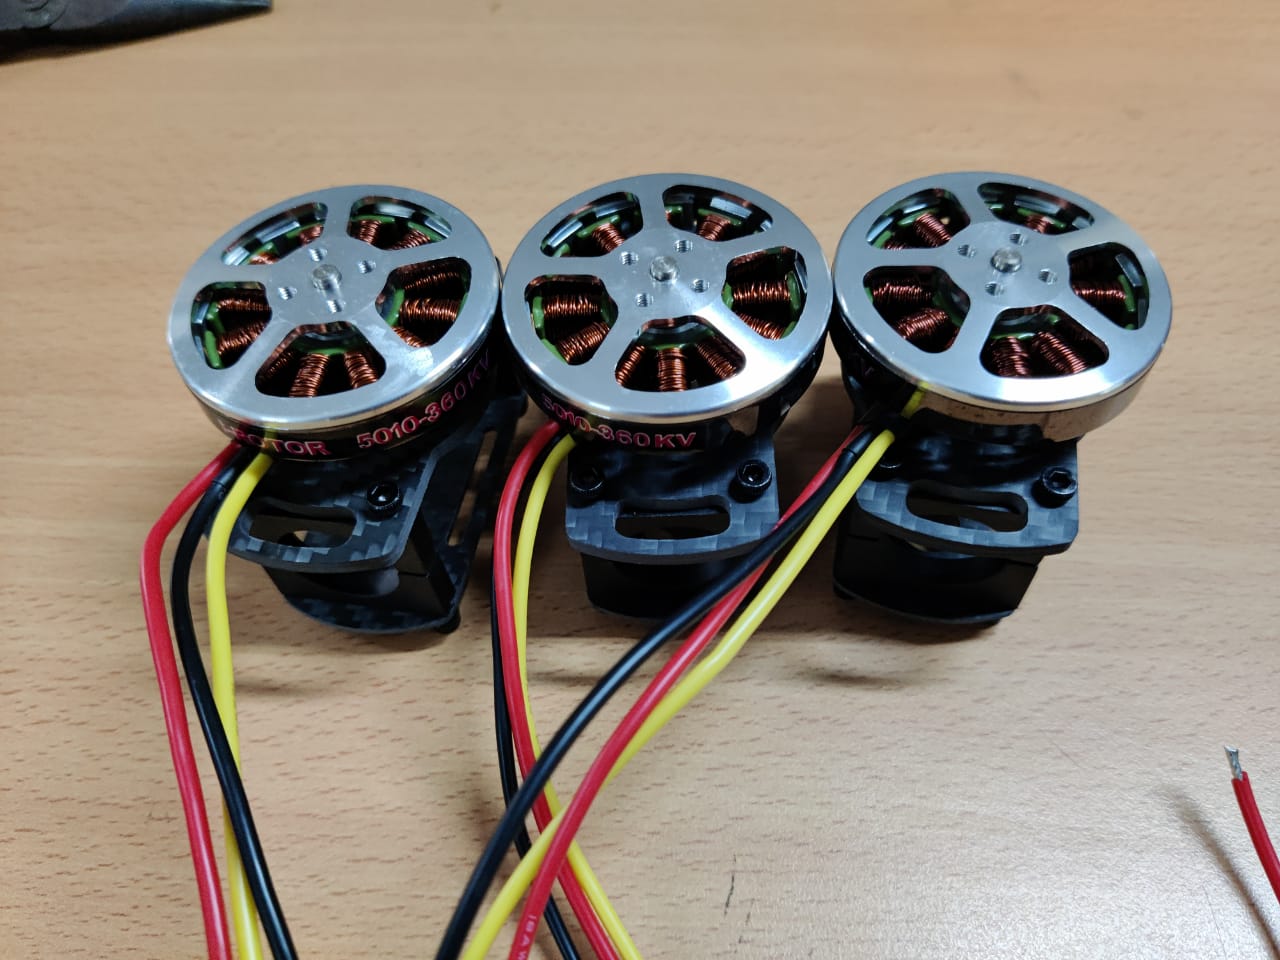
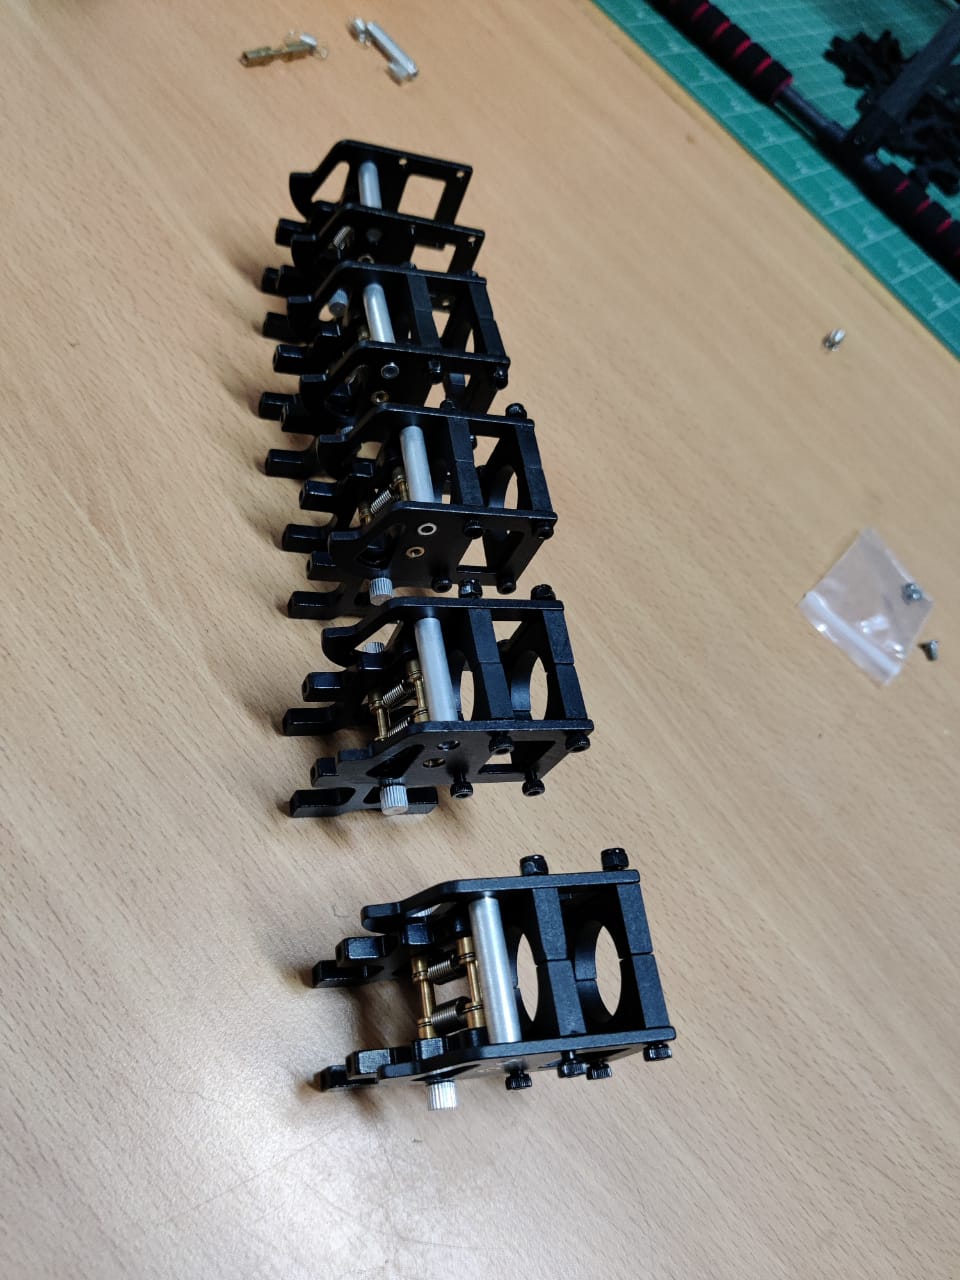
screw the carbon fiber plate on each arm and mount the motor to the plate. When mounting the motor to the plate, screw the screws in a star shaped pattern or diagonally opposite to each other, this will evenly distribute the force and help to make sure nothing breaks. Calibrate all your ESCs one by one through the receiver directly before connect them to your FC.
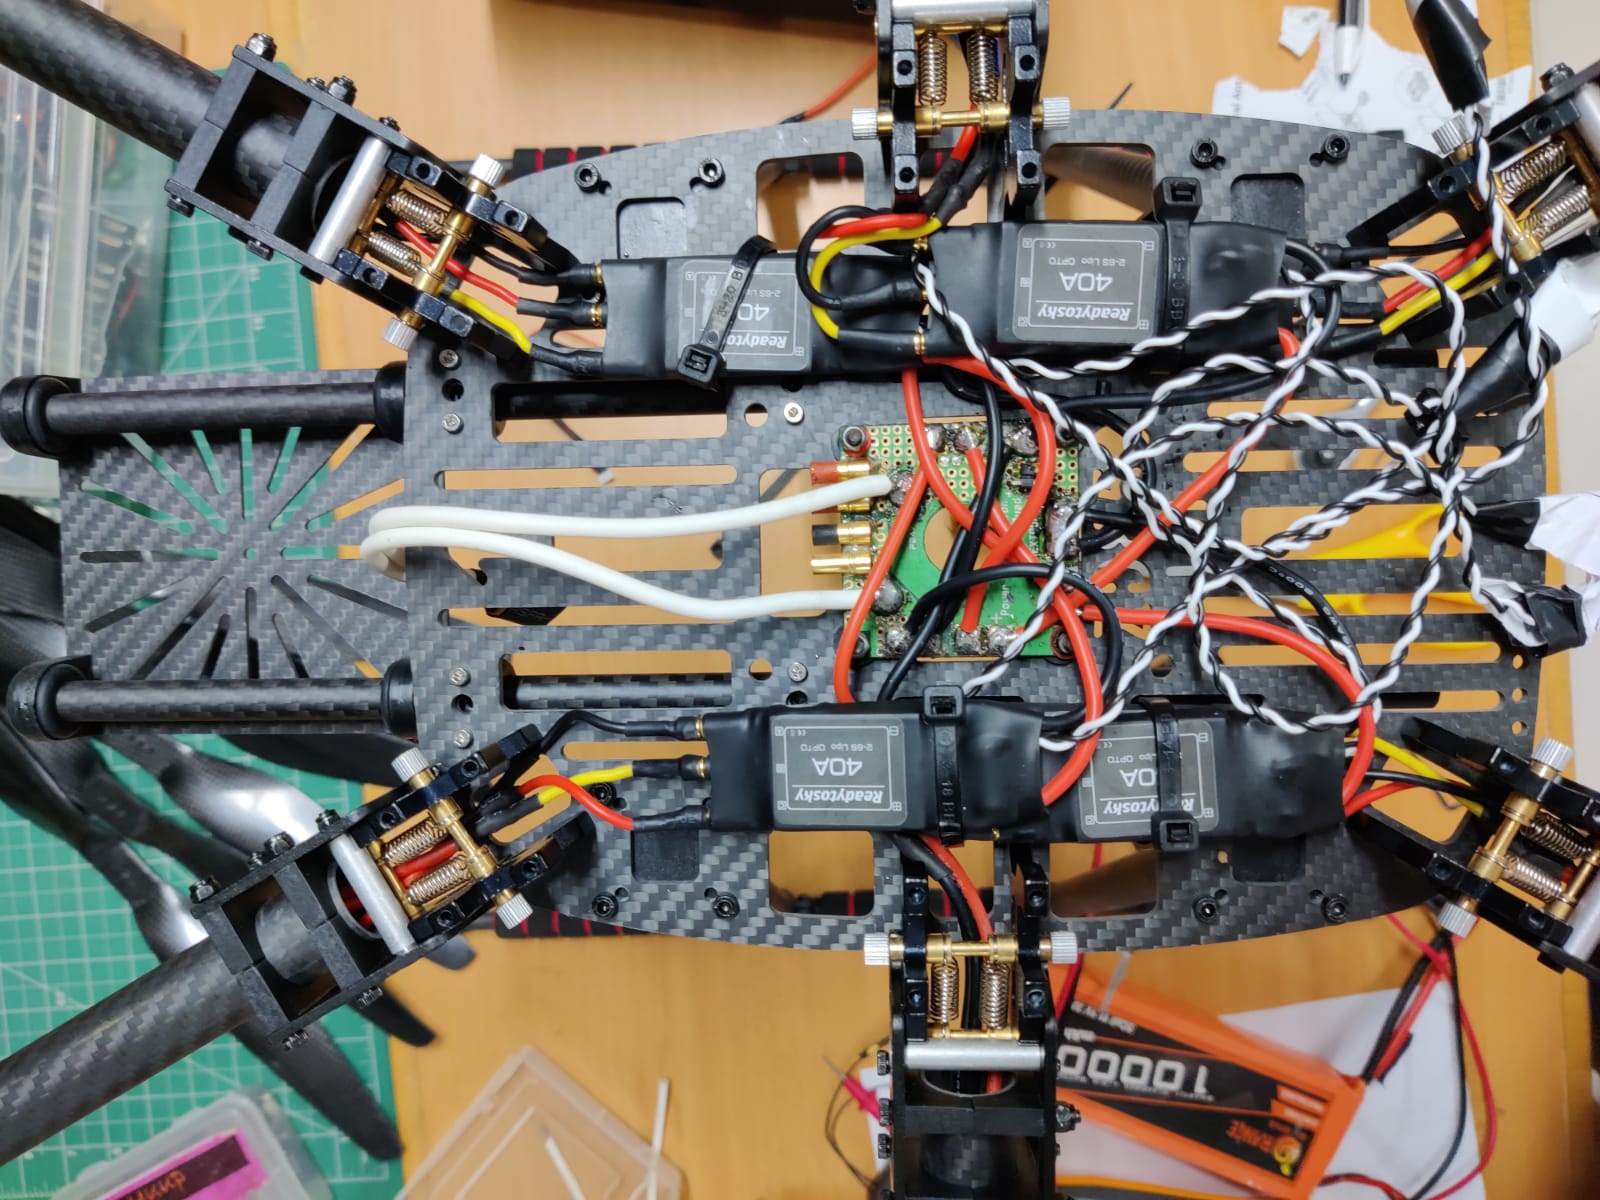
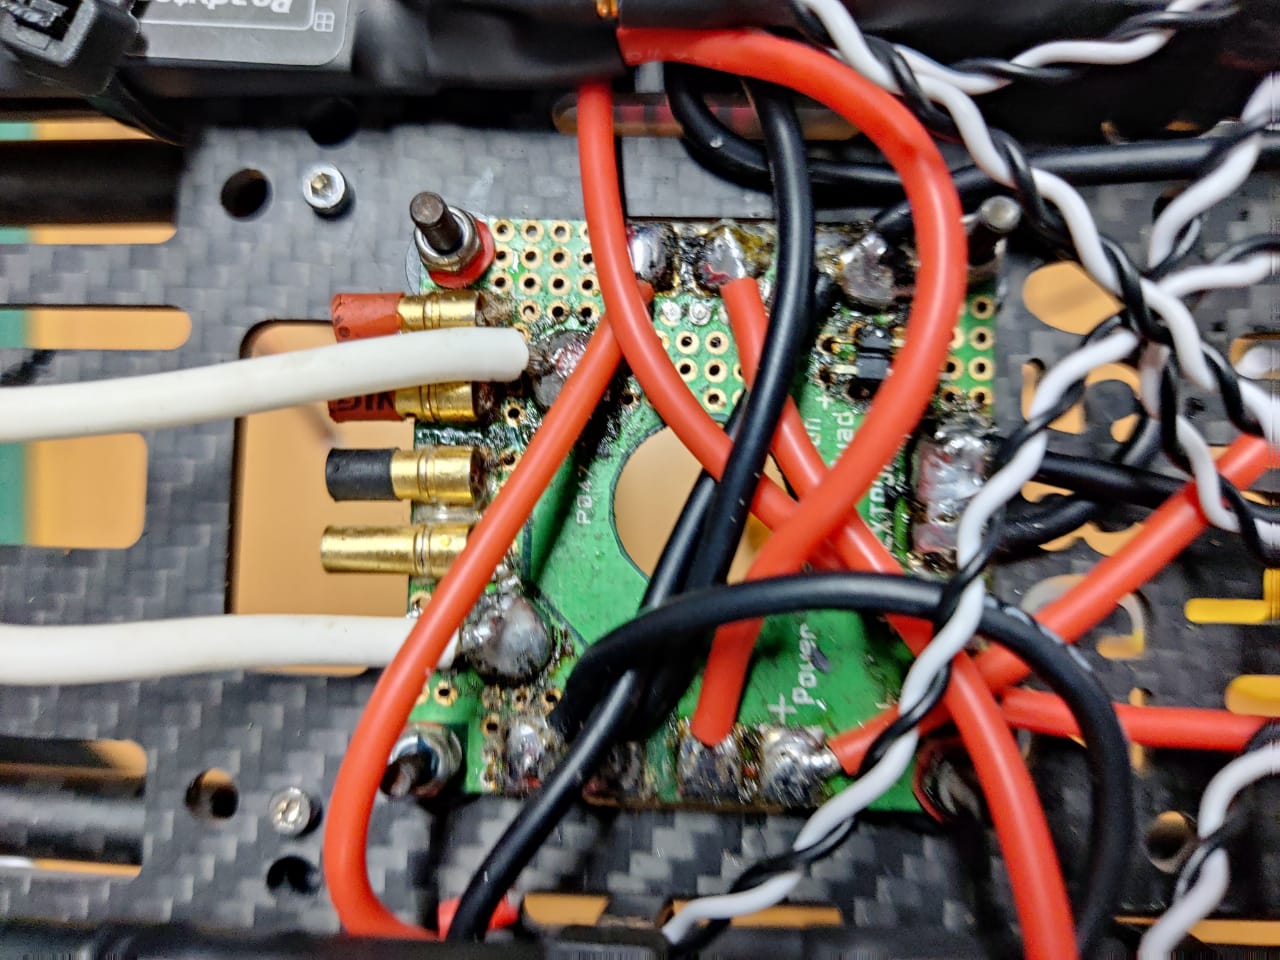
The PDB is where all the electricity will be flowing through and energizing the board, so its essential to order a good high quality PDB. To start, I soldered a XT60 Connector to the battery input and used some heat shrink to seal the leads. I then installed the PDB using nylon nuts and bolts in the center of the frame. Connect the motors to the esc's
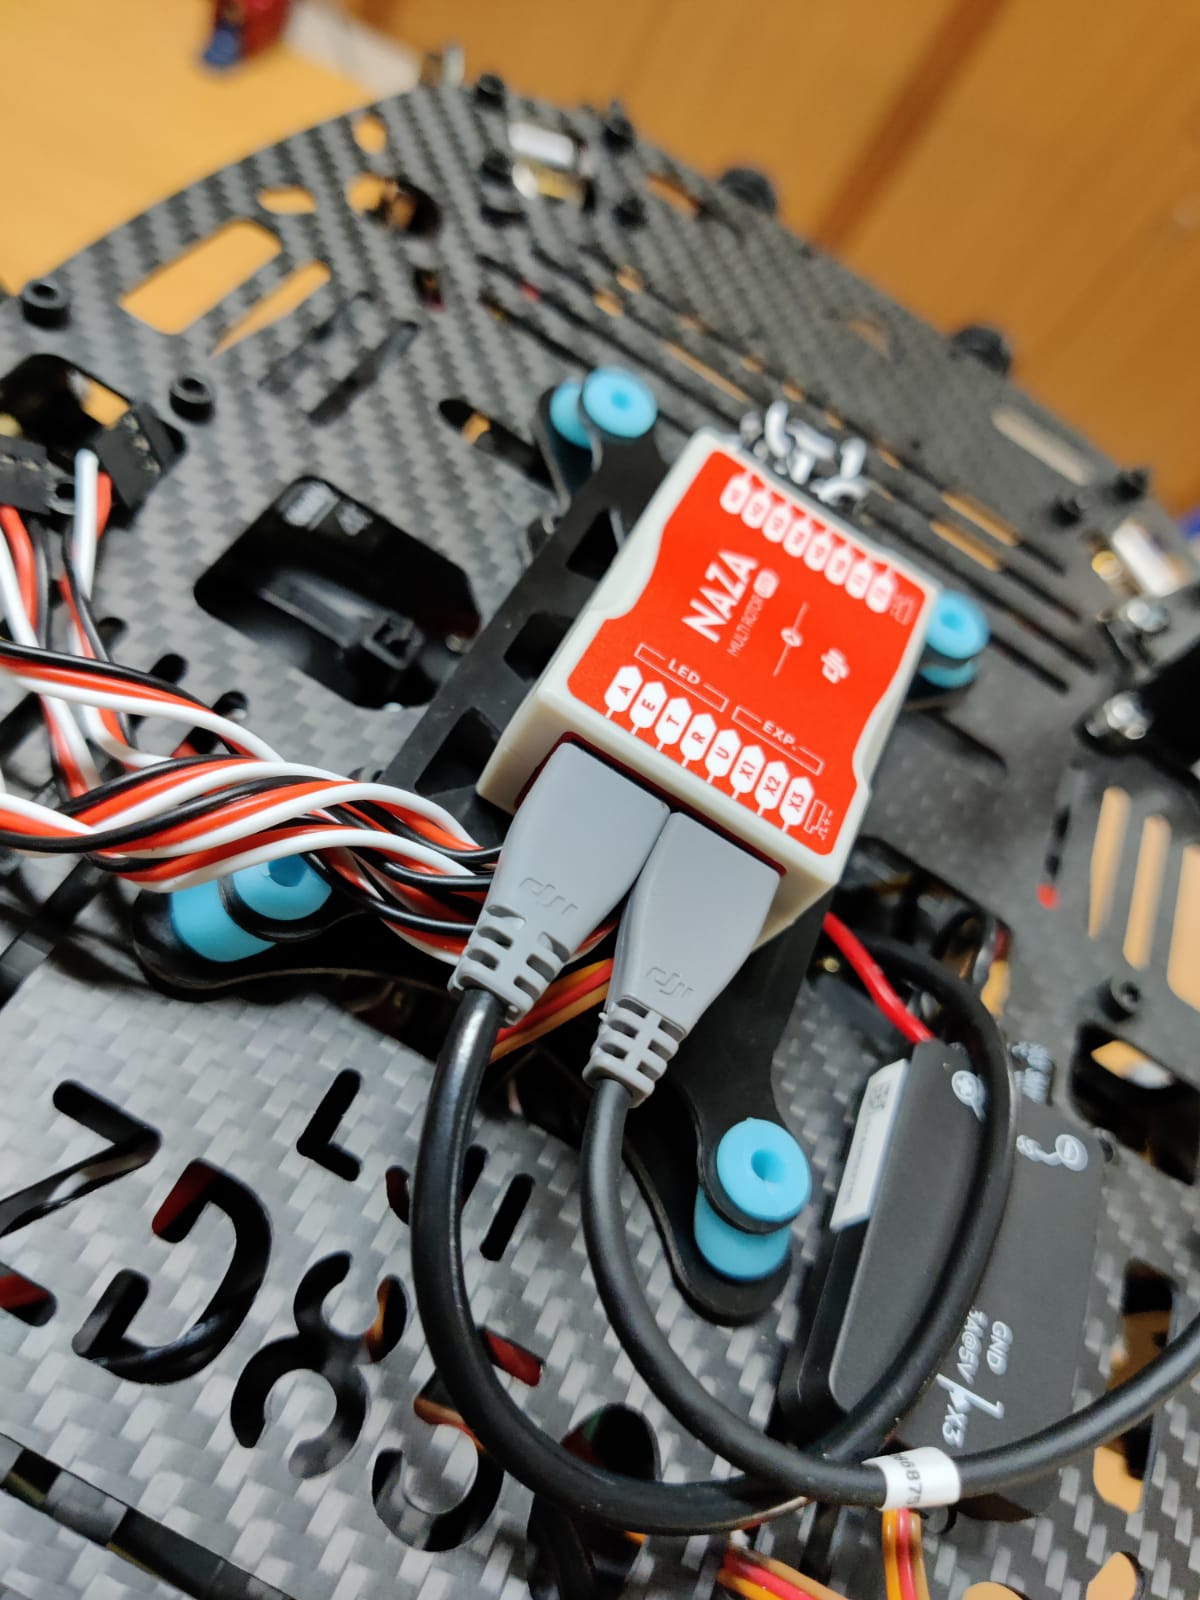
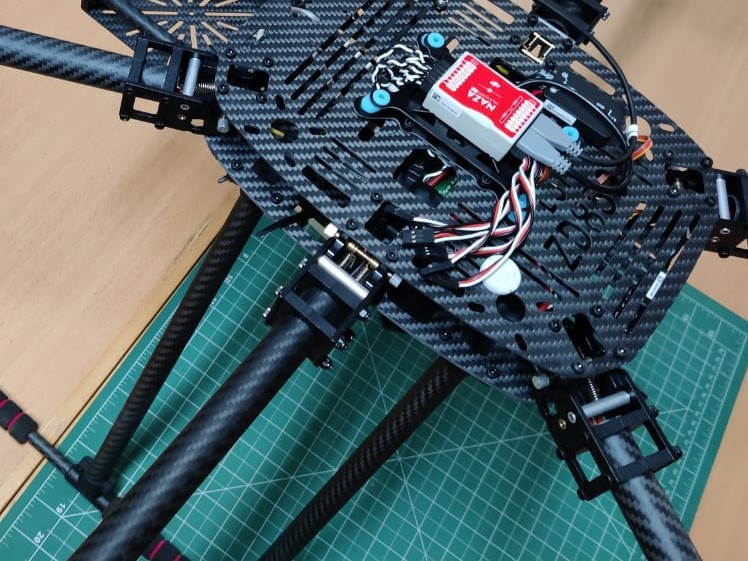
A flight controller (FC) is a small circuit board whose function is to direct the RPM of each motor through the electronic speed controllers in response to input. A command from the pilot for the multi-rotor to move forward is fed into the flight controller, which determines how to manipulate the motors accordingly. I've used a vibration dampening board to stabilize the FC but this is not required.
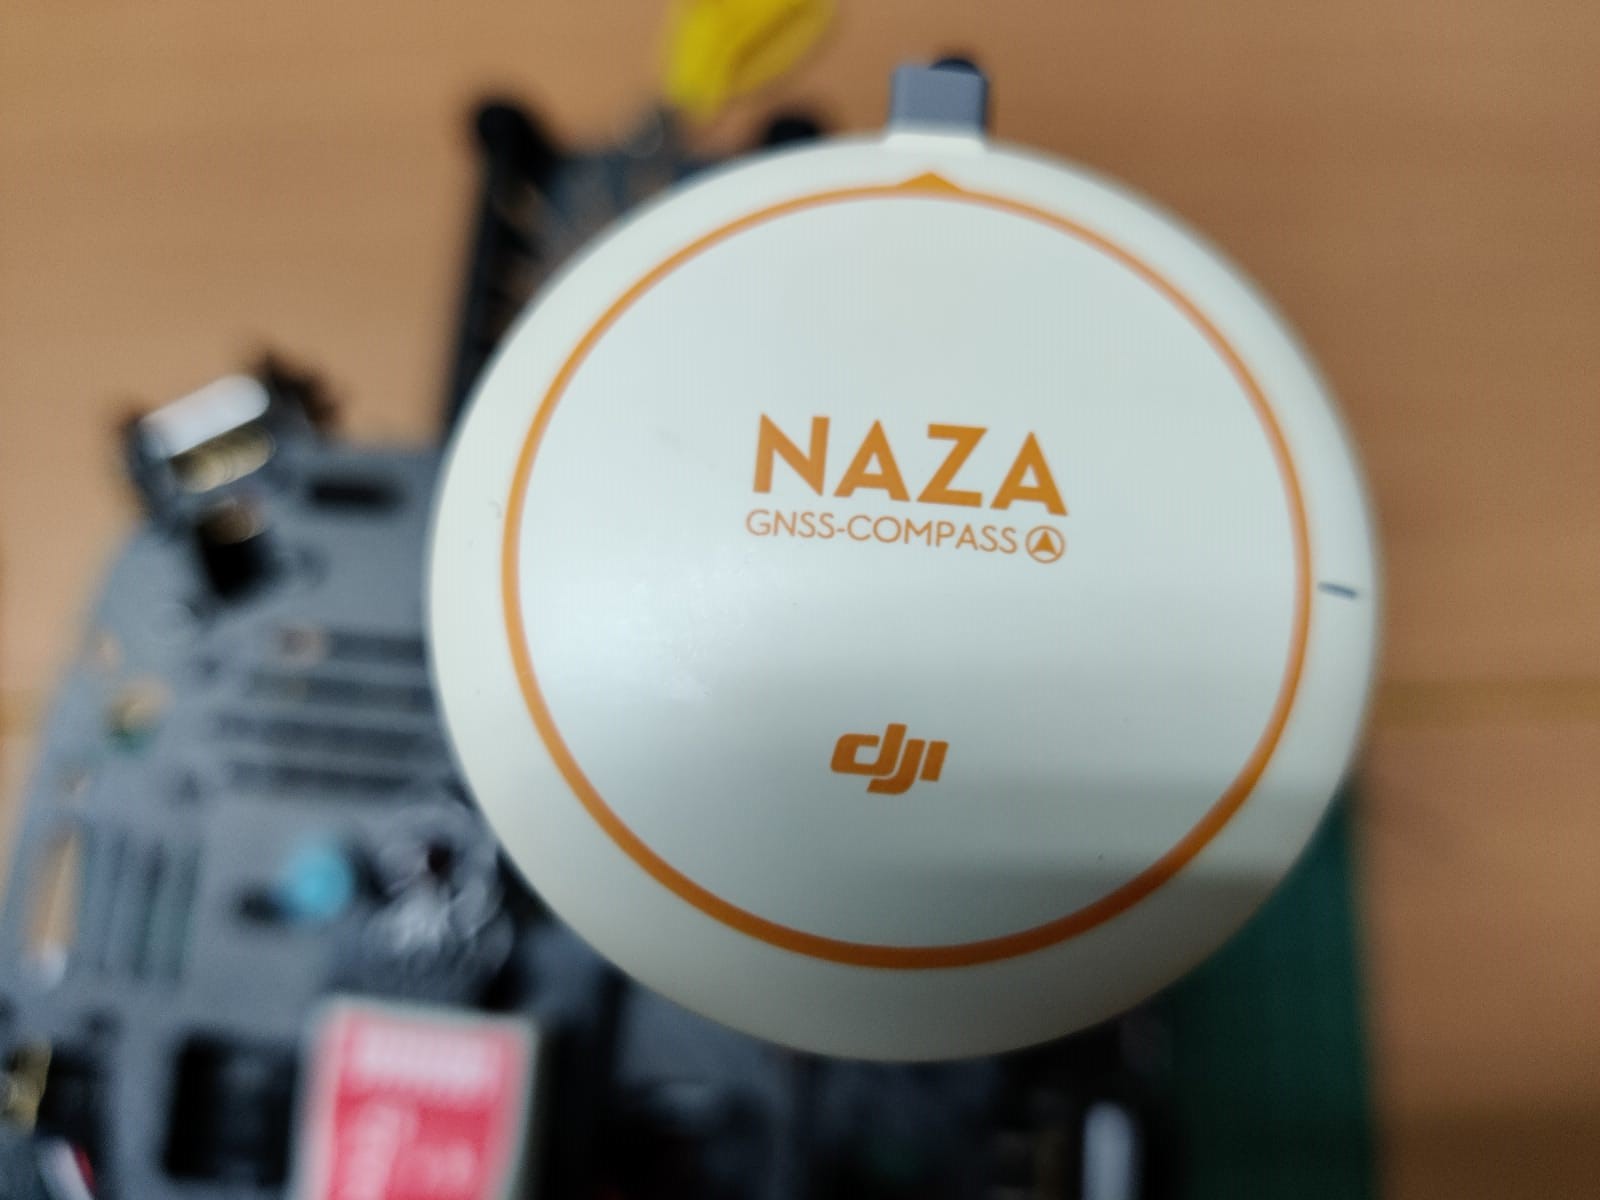
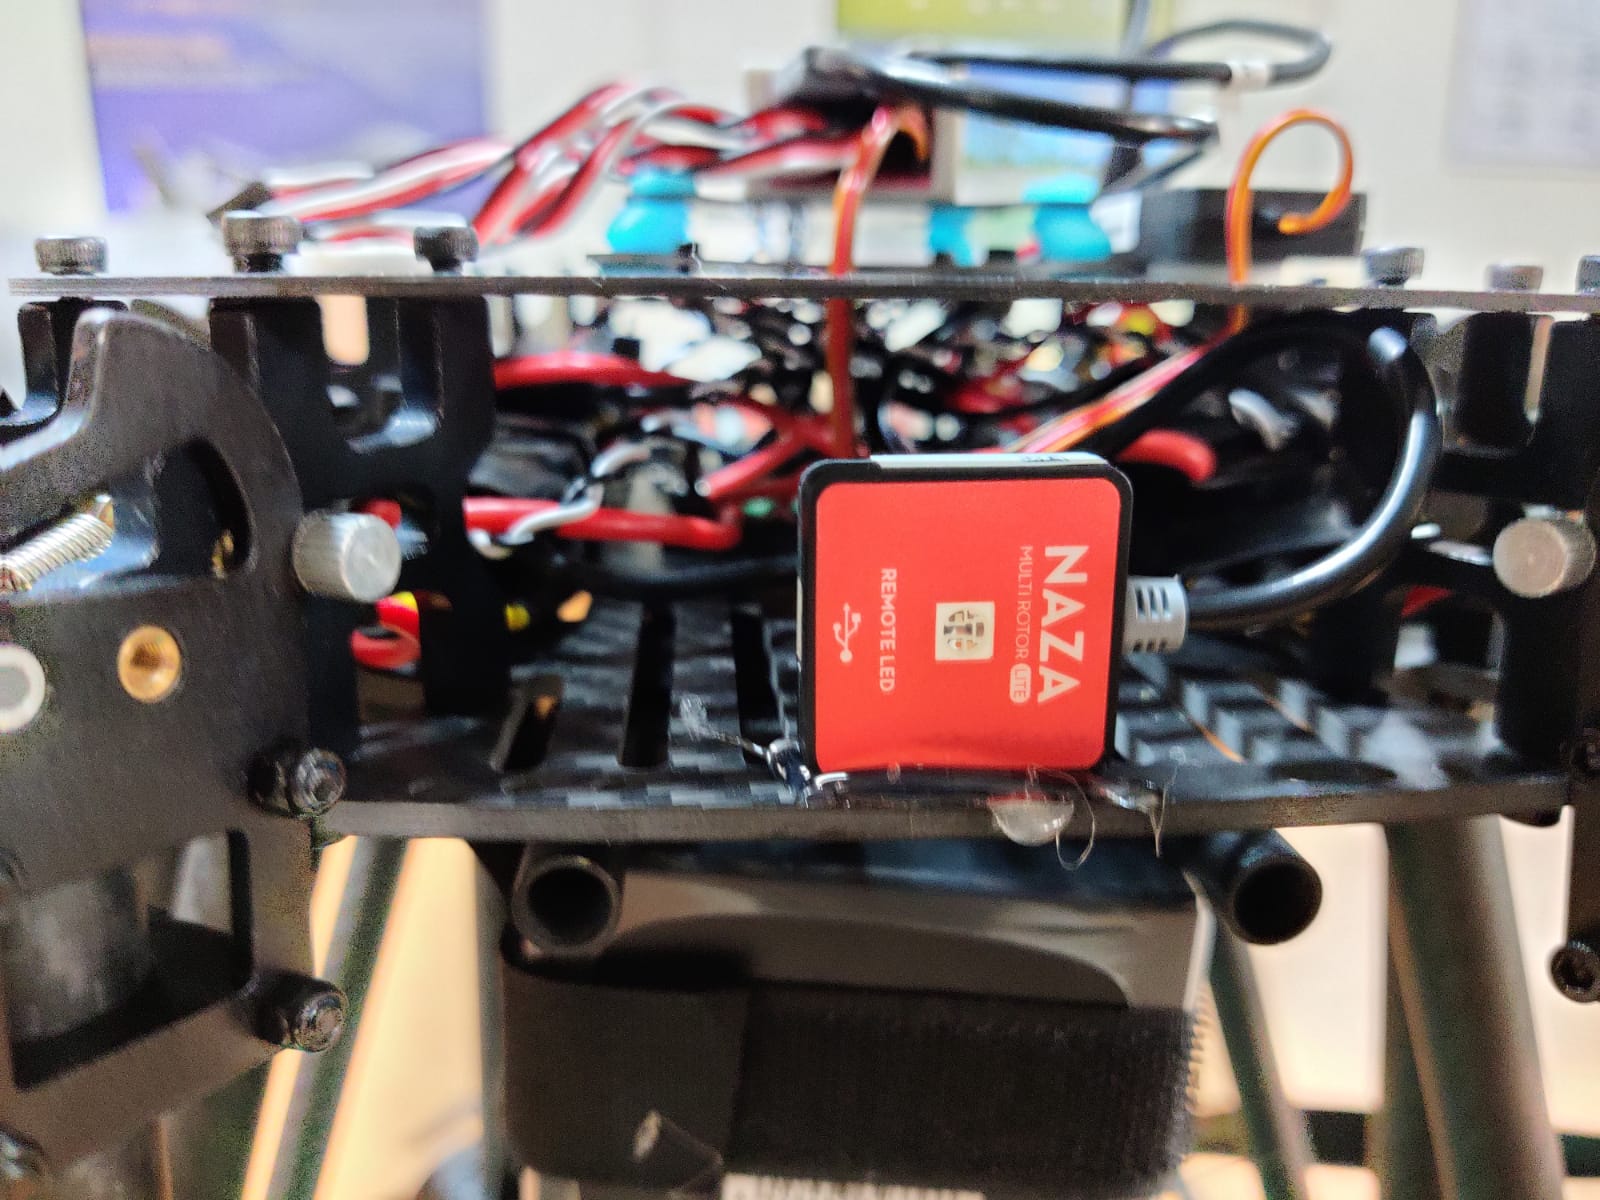
This step is fairly easy as most of the connections are labelled, connect the GPS module and LED to the FC. After making this connection mount the GPS module on the GPS stand and fix the LED to the front of your Hexacopter.
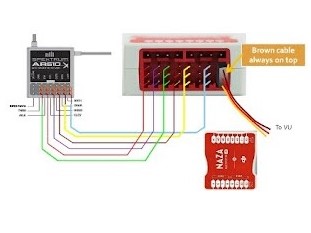
Setup the Aileron, Elevator, Throttle, Rudder channels on your TX, and connect them to the FC based on the diagram above.

Pay carefull attention to the direction in which the motors spin and calibrate their direction accourding to the image above. Propellors are of two types clockwise and anti - clockwise propellors. the leading edge of the propellor will show you the direction in which it will turn.
Install the given software for the NAZA FC and follow the instructions on screen, configure the following parameters
|
menu |
tab |
parameter |
Value |
|
basic |
aircraft |
mixer type |
Hexa-rotor V |
|
basic |
mounting |
gps position |
to be specified different from zero |
|
basic |
RC |
receiver type Command stick Calibration |
tradition |
|
basic |
RC |
Command stick Calibration |
A = REV E= NORM T= NORM R=REV |
|
basic |
RC |
receiver advanced protection |
on |
|
basic |
RC |
control mode switch |
atti |
|
basic |
Gain |
all values |
default |
|
advanced |
Motor |
motor idle speed |
recommended |
|
advanced |
Motor |
cut off type |
intelligent |
|
advanced |
F/S |
Enhanced failsafe |
Landing |
|
advanced |
IOC |
IOC |
disabled |
|
advanced |
gimbal |
gimbal switch |
off |
|
advanced |
Voltage |
protection switch |
ON |
|
advanced |
limits |
Max height |
100000 |
|
advanced |
limits |
max radius |
100000 |
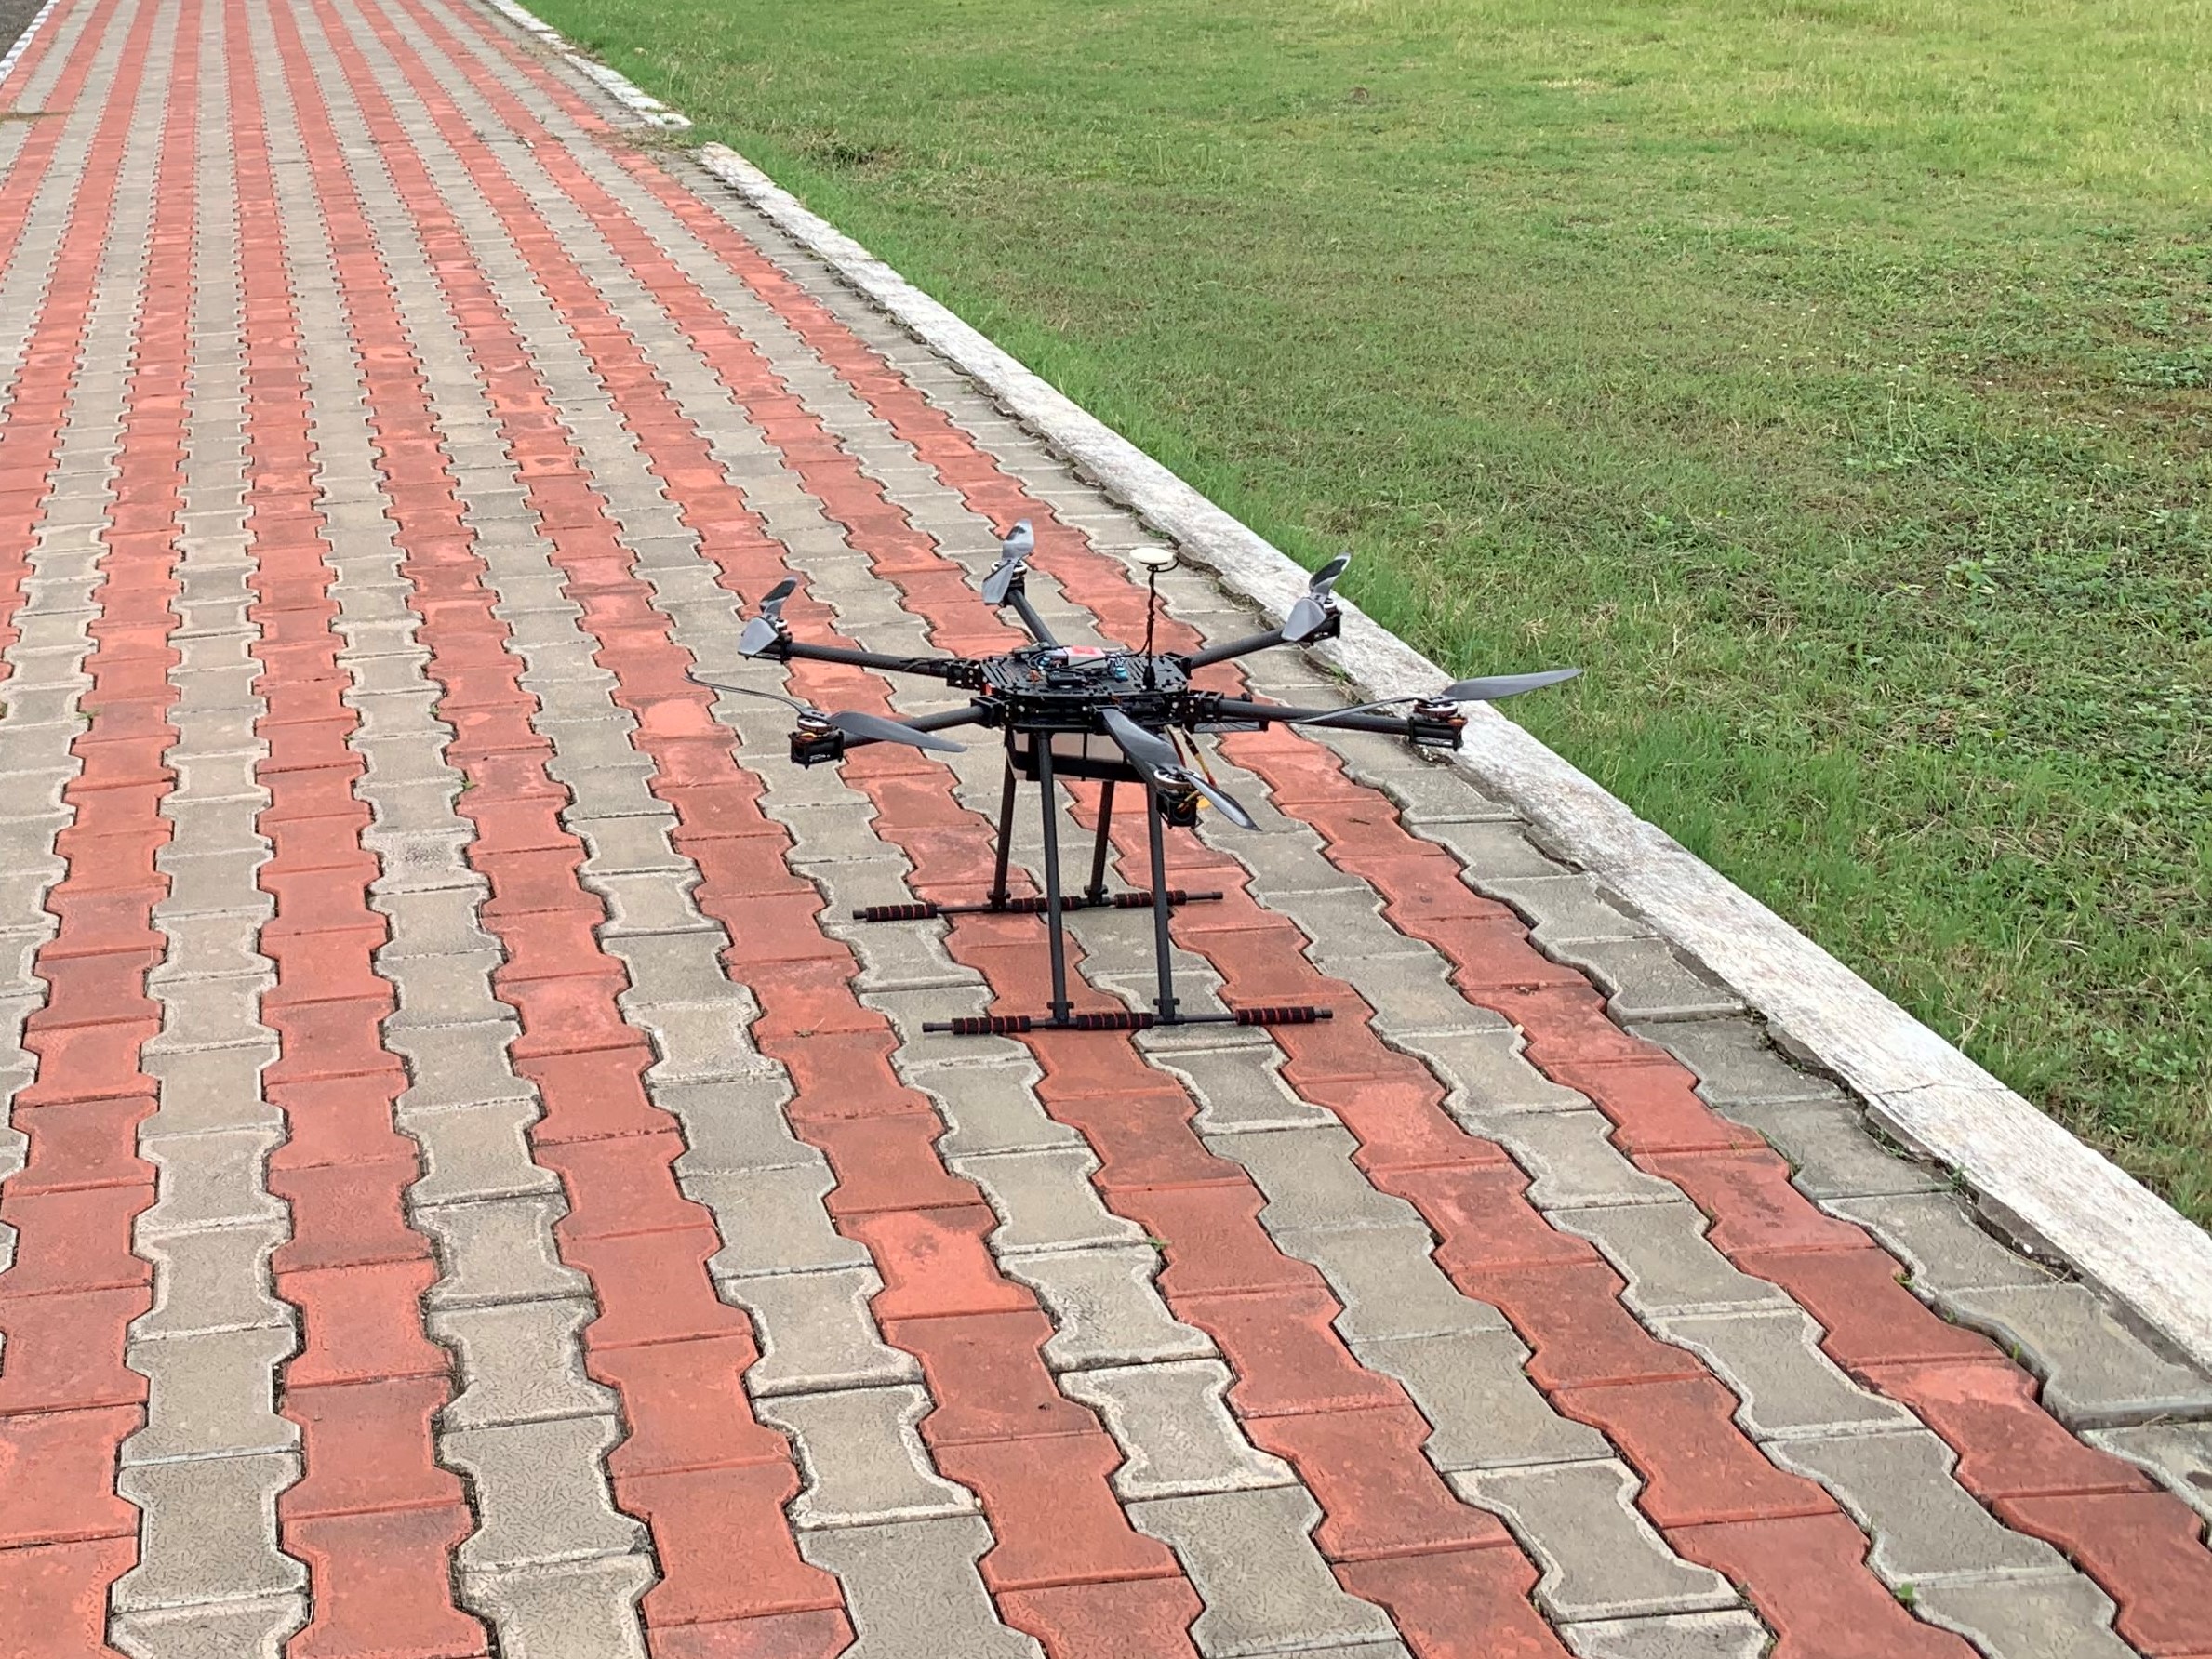
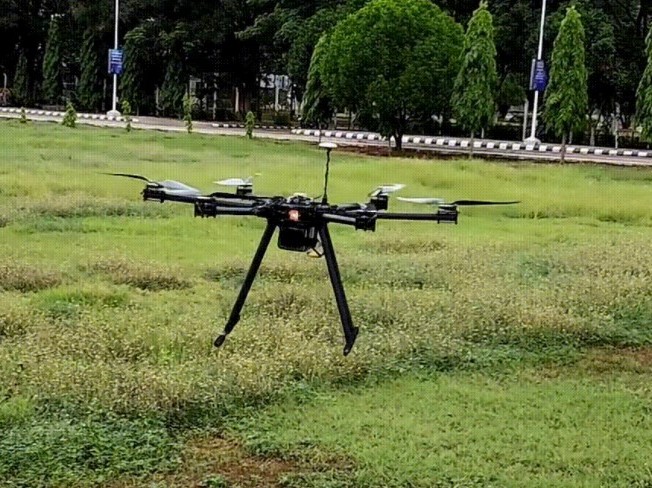
Congratulations!, your drone should be able to fly now, be carefull while flying it as is can cause serious damage if it crashes into a person.